


How To Paint Tiles

Are your tiles looking a little dated but find yourself on a tight budget? Not to worry, just follow our step-by-step guide on how to paint tiles for a low cost, yet effective solution.
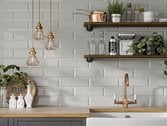
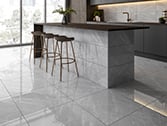
We know that the right tiles and textures can transform a room and in some cases, make a bold statement. So picking the correct colour for your tiles can be tricky. Luckily, we’re here to help.
Let's start with the basics...
Equipping yourself with the correct tools and tile paint is always a good starting point. Just follow our list below of everything you’ll need to get started:
- Paint roller ( You may prefer to use a paint brush depending on the size of the tiles)
- Tile paint
- Paint brush
- Paint tray
- Sugar soap or detergent solution
- Fine-grit sandpaper
- Filler
- Primer (if necessary)
- Bucket
- Scouring pad sponge
- LTP sealers
What you need to know
Most tiles are not made to be painted. Keep this in mind when deciding which tiles to update. Try to steer clear of areas that come into contact with moisture, for example; showers, near the sink or bath.
Tile surfaces are often glazed to a high sheen to help avoid damage and prevent any dirt, oil or dust that may build up over time. So prepping your tiles before you begin the transformation process will make all the difference.
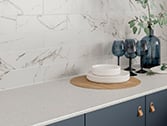
Picking the right colour:
What effect are you aiming to create? Tiles can be used to create the illusion of a bigger room. If you’re unsure on which colour or style to choose, take a look at our Instagram or Pinterest for some inspiration.
Maximum results will be accomplished through choosing the correct tile paint. You’ll want to purchase high quality paint that will need little to no upkeep. To achieve a particular colour/shade it’s likely that you’ll need to prime your tiles before painting. Consider saving yourself some time by opting for a specialist paint that requires no primer.
Follow our chart to help you determine which color to pick to achieve the effect you desire.
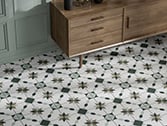
Patterned or plain?
If you’re feeling adventurous, and want to try something a little different you may want to opt for a unique patterned tile.
Patterned tiles are fantastic as a feature. They can provide a real focal point, whether that’s through a splashback wall or covering the entire floor of one room.
Stencils are also a great alternative for helping to create an on-trend patterned tile. This relatively cheaper option is surprisingly easier to create than you might think. There are plenty of options out there for a whole range of styles, which are usually easily applied simply through using a small paint brush or sponge.
Instructions:
Step 1: Clean your tiles
First things first, spend some time wiping down your tiles.
Use sugar soap or a detergent solution with warm water for the best results. Be precise and thorough with this, especially if you are working with kitchen tiles. These are likely to have built up a layer of grease and dirt over time and can be trickier to clean. Start from the top of your tiles and work your way down.
Lastly, rinse them with clean water and allow them to dry. Steam cleaners are also great for cleaning tiles and grout, so if you have one to hand consider using one instead.
Step 2: Repairing the tiles
Small chips and cracks in your tiles can be repaired using filler. Be sure to only apply a small amount to avoid bumps and lumps forming on your tile surface.
Be mindful of the condition of your grout. You’ll be painting over this and will want the finish to look as sleek as possible.
You can find everything you need for cleaning, removing or filling in the grout here.
Further reading: How To Regrout Tiles
Step 3: Sanding the tiles
Ideally you’d use a hand-held orbital sander for this step. But, we know that not everyone has those to hand. So, a fine-grade sandpaper should do the trick.
Lightly sand the surface area, avoiding sanding right down to the tile body. Once the glaze is scuffed, wipe off any remaining dust.
Step 4: Prime your tiles
The most important part of priming your tiles is to keep the layer of your coat thin. You should use a small paint brush for this, as it allows you to cover your grout more effectively. After the primer is dry, lightly sand. This ensures the paint will adhere to the new surface.
Step 5: Painting your tiles
For this step we recommend using a brush, but if you prefer a paint roller feel free to use one of those instead. The aim here is apply the paint in thin layers to prevent large brush strokes or the chance of it peeling after a couple of weeks.
If you’ve chosen to use a stencil, make sure it’s placed in the correct position and choose to work with a brush for this application. This gives you much more control over your paintwork.
Most of the time, you’ll apply around 2 coats. However, be prepared to wait and apply additional coats if you are covering darker or patterned areas. Make sure to open some windows! Keep the humidity low to let any primer and paint dry properly.
Step 6: Let them dry
Be Patient! Try to allow at least 24 hours for your paint to dry. Rushing this process will only result in a rather messy bunch of tiles.
Step 7: Seal your tiles
And last but most definitely not least, to give your finished project more longevity, you should consider using a tile sealant. These help to protect the tiles against water, oil, grease and dirt. So that your time and effort transforming your tiles won’t go to waste.
Share your projects with us...
Hopefully, after following these steps you will now have a good idea on how to paint your tiles perfectly, maintain and protect them correctly. We’d love to see your tile transformations so please tag us in your project pictures on Instagram or Twitter using the hashtag #TileGiant or tag us!

Share your photos with us on Twitter or Instagram to be featured, using #TileGiant
We hope you found this guide to painting tiles useful! If you are still having trouble deciding what colour or pattern to use, take a look at our customer projects for inspiration, or have a look at our Instagram and save some posts that resonate with you.