


How To: Mix and Apply Ultracolour Plus and Mapesil

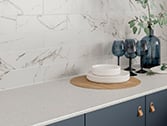
With excellent water and abrasion resistance, Mapei’s Ultracolour Plus with its wide range of colours, offers the perfect grouted finish to the tile installation.
Materials required:
- Mapei Ultracolour Plus
- 500ml Water
- Mapesil AC Silicone
Tools & accessories required:
- Floor protection sheet
- Mixing bucket
- Protective gloves
- Mechanical stirrer
- Soft rubber float
- 2x Buckets of water
- 2x Sponges
- Microfibre cloth
- Silicone applicator gun
SHOP ALL TILING TOOLS & ACCESSORIES HERE
Preparing and applying Ultracolour plus grout
Preparing the area
Before considering grouting, ideally all spacers should be removed. Ensure that all joints are free from adhesive or any loose material. When applying grout to the walls, ensure that all areas are protected from spillage. The key to applying grout to an excellent finish is not only in the application, but in the mixing itself.
Mixing the grout
When mixing Mapei Ultracolour Plus the bag must be shaken to ensure an even distribution of ingredients. A clean mixing vessel should be used and the minimum recommended water placed in the bucket. Measuring water on site can be difficult so an empty 500ml drinks bottle can be used to measure the water.

When 0.9l of water is in the bucket, the bag can be opened and all the contents poured into the bucket. The mixing of the product should be carried out by mechanical means. During the mixing the product will appear dry but this is expected.
After mixing with the paddle for approximately 2 minutes, the product should be allowed to stand for 2-3 minutes, this will allow the product to slake. After 2-3 minutes the product can be remixed. If at this point the product still appears too dry, the remaining 0.1l of water may be added.
Once mixed, the grout will remain workable for approximately 20-25 minutes. If the grout begins to harden in the bucket, it can be remixed with the mechanical stirrer, but do not add any more water.
Applying Grout to the Wall
The grout can then be applied to the wall surface using a soft, rubber float. The method of application is down to personal preference, however pointing the joints in a way that allows the air to be removed from the joint is advisable.

The grout must be compacted into the joint, ensuring a full joint is achieved. A simple spread over the top surface could lead to the materials sitting at the surface of the joint, either leaving a void behind or allowing pinholing to occur during the washing off process.
Once the grout is in the joint, the grout float can be used at a 45 degree angle to remove excess from the tile surface. Care should be taken at this point so as not to remove too much of the grout from the joint itself.
Once the grout has been applied and the material on the surface begins to dry, the washing off process can begin.
Washing off excess grout
It is advisable to have two clean buckets of water at this point. The first bucket will be used to rinse the sponge of the bulk material. The second will be used as a secondary clean.
Soak the sponge in clean water and wring out until simply damp. In the first instance, we are simply looking to remove the grout from the surface of the tiles. A circular motion can be adopted for this.
Regular rinsing of the sponge will prevent the excess grout simply being moved around the surface of the tiling. When the excess grout has been removed, the secondary wash can take place. A diagonal movement turning the sponge regularly will remove the remaining film.
Preparing internal corners for sealant and creating a perfect joint finish
The internal corner and movement joints must be free from any grout material and can be cleaned out at this stage.

If any pinholes or low spots have occurred, simply top these areas up with the grout material and sponge off. After this step has been completed, we can concentrate on the joint finish. With the sponge, strike the joints to ensure an even finish to the surface.
Please ensure that the sponge is only damp throughout all of the aforementioned process, as excess water applied at any stage can have a detrimental effect on the grout finish.
Removing excess film
Although several washes have been carried out, a slight film may be left on the surface of the tile. This can be removed after a couple of hours with a microfibre cloth. Simply buff the surface of the tiles removing the residue.
Applying Mapesil AC
Once the Mapei Ultracolour Plus has dried, Mapesil AC should be used in all areas subject to movement, such as internal corners and around baths and showers.

To install the Mapesil AC, cut the top of the tube. The nozzle can then be screwed onto the silicone tube. The small end of the nozzle must be cut at a 45 degree angle to a slightly wider opening than the joint width.
Once cut, the tube can be loaded into a suitable silicone applicator gun. The nozzle can be offered to the joint, to check that the nozzle cut width is slightly larger than the joint width. Squeezing the trigger will push the new silicone into the nozzle and this can be wiped at the end.
The silicone can then be applied to the corner. A slow, steady pace should be adopted, squeezing the trigger consistently. Once the joint has been covered, we are ready to finish the joints. For ease, water can be used - wet the finger and smooth gently over the joint, wiping any excess silicone away.

Share your photos with us on Twitter or Instagram to be featured, using #TileGiant
Head over to our YouTube channel to browse more how-to videos, or contact our team for further expert advice.