


How To Fix & Install Glass Tiles and Mosaics

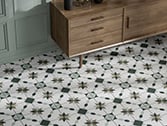
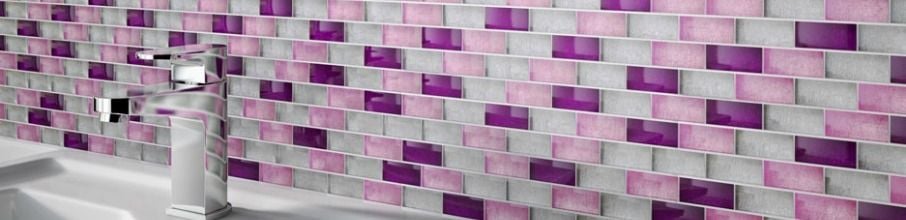
Over recent years, glass has become a far more popular material when designing bathrooms and kitchens. Mosaics made of glass are a particularly popular way of introducing glass into bathrooms and kitchens. They may be used in large areas, alternatively they may be used to highlight a particular wall or feature or used as a border.
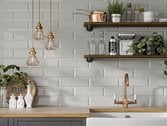
Transforming your kitchen with a statement splashback can be a relatively inexpensive project to undertake, with impressive results. Most splashbacks are often applied above stove tops or hobs, but you can easily apply this to around sinks too providing that you correctly seal the tiling.
As with any home project, failing to plan is planning to fail, so here are our top tips and advice for how to fit glass tiles and create a stunning mosaic tile splashback in your kitchen.
How to handle glass tiles safely
Extra care should be taken when using unfitted glass in any home renovation project and tiling is no exception. Mosaic and glass tiles are fragile and can easily break, shatter or splinter leading to a risk of injury or damage to other surfaces.
To handle mosaic tiles and glass tiles properly, you should make sure you wear eye protection and have heavy duty gloves that will protect you from cuts and abrasions from any rogue glass particles.
It’s also important that you don’t place your glass tiles on hard or abrasive surfaces prior to fitting, such as your kitchen worktop or floor. Doing so may not only damage your tiles, but your countertops too, giving you an unnecessary extra job to carry out.
Tools required to fit glass tiles
By having these essential tiling tools to hand you can be well equipped to get your tiles up and secure and your job complete much easier and more accurately.
Tape measure - measure twice, cut once
Spirit level - not all worktops and surfaces will be flush, so ensuring your walls are level will provide a much more quality finish
Tile cutter - if you’re cutting glass tiles, make sure you use a glass blade or wet saw to avoid damaging your product
Utility knife - mosaic tiles are often supplied with a mesh backing, which will need cutting to suit your application
Notched trowel - important for applying the tile adhesive to your walls in a uniform way
Grout float - often made of or lined with rubber, this float will help you apply grout to your tiles, allowing you to cover all gaps with ease
Sponge - useful for cleaning any excess grout off your tiles and keeping them free from dirt and debris
Tile spacers - the key to ensuring a uniform look across your installation
Goggles & gloves - keeping you protected from any sharp edges or errant tile debris
SHOP ALL TILING TOOLS & ACCESSORIES

Preparing your walls to fit mosaic tiles
If you’re getting ready to tile a splashback in your kitchen, make sure you spend some time beforehand to prepare the area, protect your surfaces and allow your tiling job to run smoothly.
Remove any smaller appliances that can be moved, and cover any larger appliances and worktops with cloths to protect from dust and debris.
On your wall, ensure that any rough or uneven areas of plaster have been filled in and sanded down to create a smooth, level surface before cleaning with a mix of TSP and water and allowing it to fully dry before applying your adhesive.
To help you plan out how your tiles will be arranged on the wall, lay them out on a piece of cardboard on your worktop alongside the wall where you’ll be installing them. Plan out using tiles spacers how much material you will require and workout where you’ll need to cut the mesh backing to suit.
When fitting glass we need to think about the expansion of the glass tiles or mosaics. With this in mind, ensure that a minimum of a 2mm gap is left between the glass tiles or mosaics and any other surface (worktop, sink etc) to provide a movement joint. The movement joint gap between the mosaics/glass and any other surface should be filled with a silicone sealant following completion of fixing and grouting.
Using mesh backing for mosaic tiles
Glass mosaics tend to come on a sheet approximately 30x30cm in size. The small pieces will be adhered to a mesh, making it very easy to cut the sheets into the desired sizes using a utility knife.
However, because they are on a mesh, it sometimes makes the sheet ‘floppy’ and difficult to handle. To overcome the lack of rigidity, we suggest Mosaic Support Mesh. This is a plastic self adhesive mesh which is simply stuck on to the back of any mosaic sheet. It also helps build depth to bring the mosaics in-line with any tiles.
How to cut glass tiles
If you need to cut larger glass tiles or individual mosaics, it is very important that the correct safety equipment is used so goggles and gloves must be worn.
It’s advisable to use a wet wheel diamond blade designed for glass in conjunction with an electric cutter. Please note that this method is suitable for straight cuts only. Should you wish to cut a notch or corner out of the glass, this would need to be done by a specialist glass cutting company.
Glass should be cut on the wet wheel cutter with the coloured back face up. To avoid scratching of the glass face by any debris within the cutter bed, it is advisable to place a thin cardboard sheet or similar between the glass face and the cutter.
Which adhesives should you use for mosaic tiles?
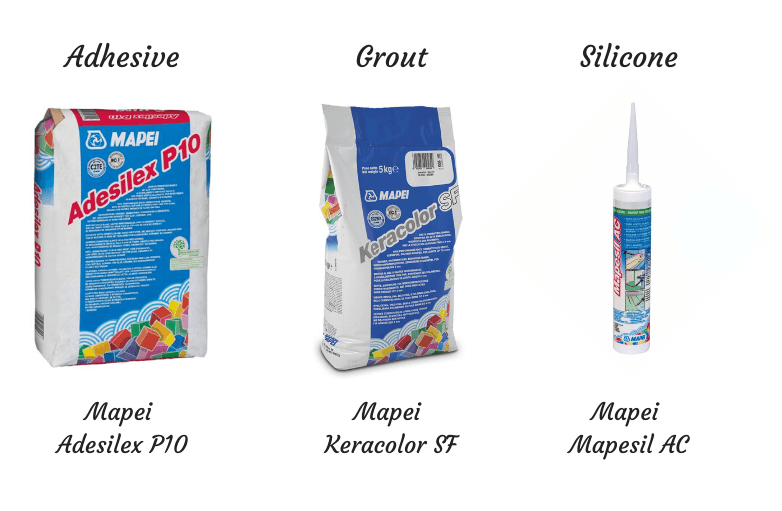
Using the correct adhesive for fitting glass is very important to ensure that the glass remains adhered to the substrate and doesn’t fall off your walls. In dry areas and moderately wet conditions (such as splashbacks and domestic showers), we recommend Mapei Adesilex P10, mixed 50% with Mapei Isolastic.
Mapei Adesilex P10 is a white, high performance adhesive specifically designed for the installation of glass, ceramic, porcelain and natural stone mosaics. It is a cement based powder with excellent non-slip properties and benefits from an extended opening time.
Mapei Adesilex P10 must be mixed with Mapei Isolastic (in a 1:1 dilution with water) to make it flexible and suitable for fixing glass.
The Mapei Isolastic will need to be pre-mixed with water before adding it to powder. So for a 5kg bag of Adesilex you would need to premix 0.9 litres of Isolastic and 0.9 litres of water in a bucket before adding the 5kg of Isolastic Powder.
Which grout should you use for mosaic tiles?
When grouting glass and metallic mosaic tiles, we recommend using Mapei Keracolour SF as the particles are extremely fine and are far less likely to scratch the surfaces of your tiles. Using a more coarse grout should be avoided as these can not only cause a less desirable finish but damage the glass.
Before grouting any glass, the adhesive which has been used should be allowed to dry for at least 24 hours.
Grout should be worked into the spaces between the mosaics with a rubber float, pressing firmly to eliminate any air pockets, ensuring as little contact with the glass face as possible. Ideally, you should only grout around 1 square metre at a time and remove any excess grout and wipe with a damp sponge before continuing.
If grout is allowed to dry on the surface of the glass, this can then be dragged across the surface when cleaning down the surface and cause unnecessary scratching and damage.
How to correctly seal mosaic tiles
Sealing your tiles is extremely important as this stops any moisture from seeping into the backing and protects your tiles from steam, splashed water and other things such as soap or splashback from cooking.
After your grout has been applied, clean thoroughly to remove any residue or excess and allow to fully dry. Apply your grout sealant according to the manufacturer’s instructions and wipe away any unabsorbed excess. To finish, fill the expansion gaps with caulk or silicone sealant - especially around sinks and where your tiles meet your work surfaces.
How to clean and maintain glass tiles
The main draw of glass mosaic tiles are their shimmering appearance, but in rooms with heavy use such as the kitchen they can become dull and dingy from a mix of moisture and other sources of contamination. That’s why it’s important to regularly clean your tiles, particularly if there has been splash back from cooking oils, sauces or detergents.
To get the shine back into your mosaic tiles, spray cleaner onto the tile surface and wipe clean with a soft cloth, taking care not to damage the grout or sealant.
Make sure you protect the surface of tiles by avoiding using abrasive sponges or brushes as these can scratch the glass and lead to crevices and cracks where dirt can harbour and spoil the shimmering effect of your new tiles.

Splashback Or Tiles: What’s The Difference?
A kitchen splashback refers to the material on the wall above the sink, cooker or overall benchtop space. It’s used to protect the wall from oil, grease and splashes that without, could stain and damage this space, ruining your kitchen interior.
There are lots of different ways you can create your own kitchen splashback aside from using a splashback itself. From utilising tiles, wallpaper, or stainless steel, you can create a statement section of your wall - typically behind a hob - fitted to protect the walls.
However, it’s important that the material you use can withstand heat, water and cleaning products to ensure it doesn’t wear away over time and it maintains its beauty.
That’s why glass splashbacks are one of the most popular choices. Their strong characteristics make them ideal for withstanding the constant change in temperatures and humidity. Let’s explore more of the properties which make them so great.
Summary
Mosaic tiles provide a great deal of quality and sophistication to your home for a relatively minimal outlay, but installing and maintaining to a high standard can be the difference between a subpar finish and a dazzling statement splashback.
If you have any further questions on how to install glass tiles in your home, contact our customer service team who will be happy to assist you.
We’d love to see your projects, share your tiles on Twitter or Instagram with the hashtag #TileGiant and you could be in with a chance of being featured in our Customer Projects galleries.